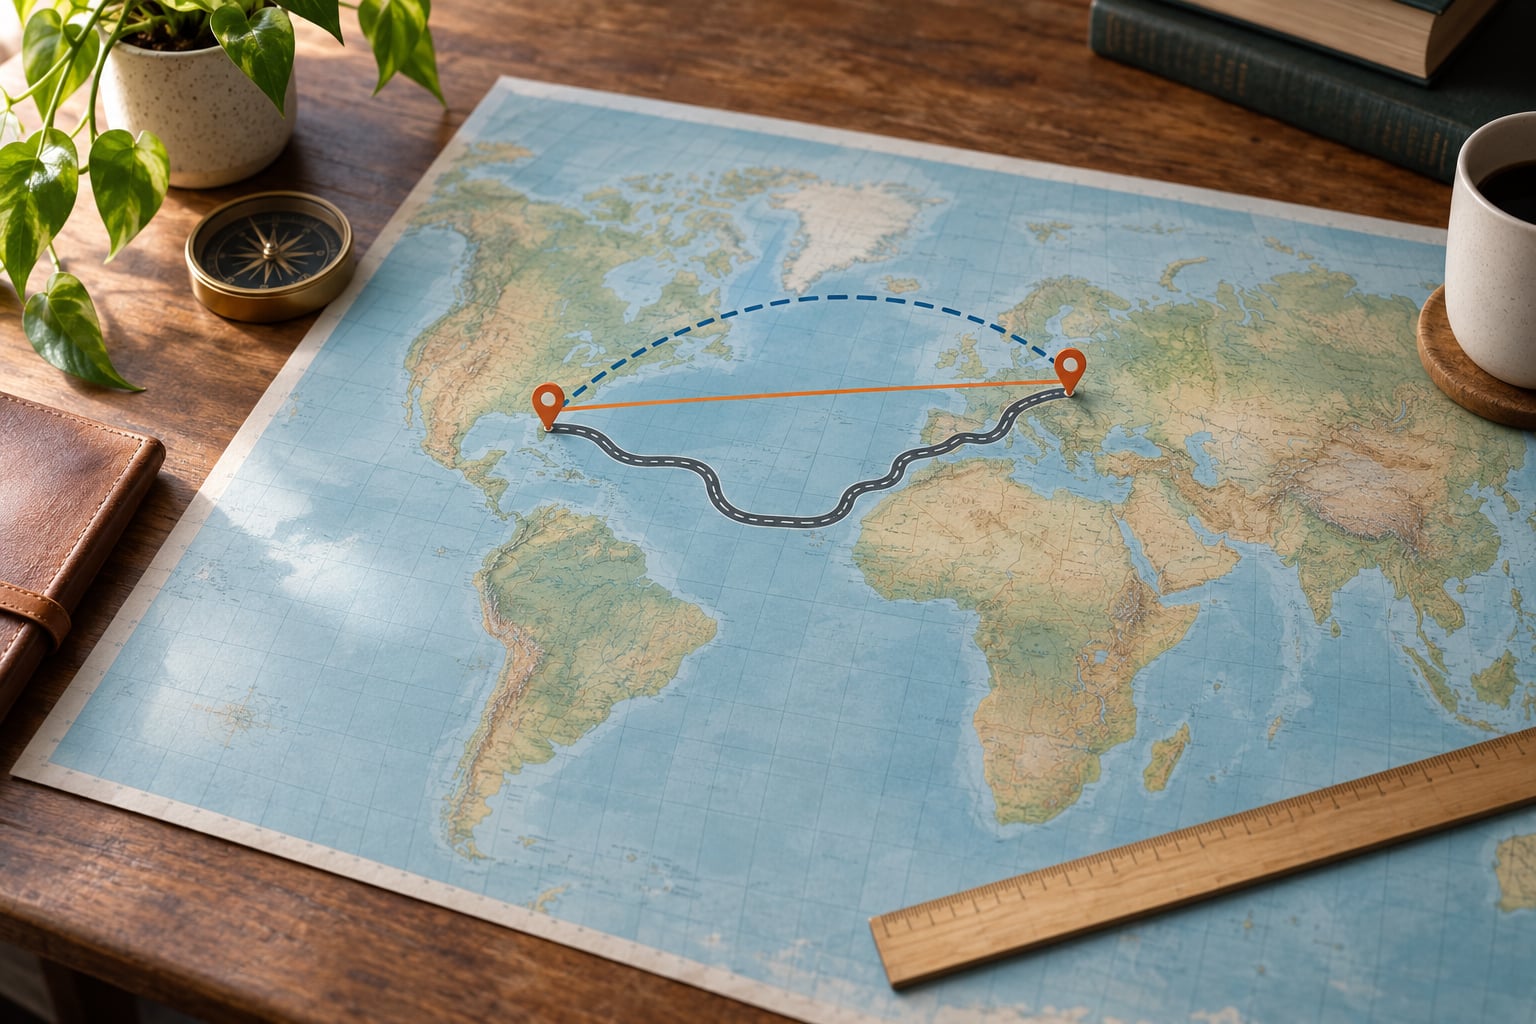
To calculate distance between points in GIS you first pick one of three measurements: Euclidean (a straight line on a flat projected map), geodesic (true ground distance across the earth’s surface), or network distance (the real route along roads and paths). In QGIS the paths are Vector, Measurement, then Distance Matrix or Distance to Nearest Hub; in ArcGIS Pro they are the Near and Generate Near Table tools in the Proximity toolbox.
Both tools run in seconds. The reason so many results come back wrong is almost never the tool, it is the coordinate system, so that decision comes before the clicking starts. The steps below follow that order. Last updated October 2026, tested on QGIS 3.x and ArcGIS Pro 3.x.
Table of Contents
- 1What You Need
- 2Step-by-Step: How to Calculate Distance Between Points in QGIS and ArcGIS Pro
- 3Which distance method should you use?
- 4Prepare and inspect your point layers
- 5Measure straight-line distance between two points in QGIS
- 6Measure distance from many points in QGIS
- 7Calculate distance between points in ArcGIS Pro
- 8Check units, projection, and coordinate systems
- 9Interpret and validate the distance result
- 10Worked examples of common GIS distance jobs
- 11Common Mistakes
- 12Tips for reliable GIS distance analysis
- 13Frequently Asked Questions
- 14How do I calculate distance between points in ArcGIS Pro?
- 15What is the formula for distance between points?
- 16Why are my distances coming out in decimal degrees?
- 17When should I use haversine distance instead of geodesic?
- 18How do I get the distance from every point in one layer to every point in another?
What You Need
Four things, and only one of them takes real thought.
- Point layers with a defined spatial reference. Every layer must carry a coordinate reference system, not just coordinates. If you imported from a CSV or Excel file, QGIS and ArcGIS Pro will guess or default to WGS84 (EPSG:4326), which stores angles in decimal degrees rather than a distance.
- A distance-capable package. QGIS 3.x and ArcGIS Pro 3.x both cover everything in this guide. ArcMap and older ArcGIS releases use the same tool names, so the workflow transfers directly.
- A decision between the three distance types (Euclidean, geodesic, network). Your question determines the answer: straight-line separation, true ground distance, or travel distance.
- Road or path network data, only if you need network distance. That means a road centreline layer with the connectivity attributes a network dataset expects. Without it you can approximate travel distance with a straight line, but you cannot claim it is a route.
A projected coordinate system converts the earth’s curved surface onto a flat plane using linear units, usually metres or feet, so a distance read from the map equals a real ground distance within the projection’s area of accuracy. A geographic coordinate system, WGS84 being the most common, stores latitude and longitude in degrees, so it has no distance unit at all until you project or measure geodesically.
Step-by-Step: How to Calculate Distance Between Points in QGIS and ArcGIS Pro
Which distance method should you use?
Euclidean distance is the straight line between two coordinates in a flat plane, calculated with the Pythagorean form. It is only as good as your projection, and it is the default in most tools.
Geodesic distance solves the shortest path across an oblate spheroid, the shape the earth’s actually is. It ignores the projection entirely, so it stays correct at continental scale and in polar regions. Every major GIS package can do it, usually through a single Distance method setting.

Great-circle distance, usually computed with the Haversine formula, treats the earth as a sphere. It approximates the ellipsoid well and is perfect for raw latitude and longitude pairs in a spreadsheet, but it drifts from a true ellipsoidal distance on long routes.
Network distance, also called cost distance, follows a network of roads, trails or rivers and returns the length of the route rather than a straight line. Related tools include the ArcGIS Pro OD Cost Matrix and Least Cost Path.
Geometry also changes the answer, and Esri documents this cleanly as three rules. Point to point is the straight line connecting them. Point to line is the perpendicular drop to the line, or to the nearest vertex if no perpendicular falls within the line’s extent. Point to polygon is measured to the polygon’s boundary, never its centroid, which is worth remembering because the result is zero for any point sitting inside the polygon.
Prepare and inspect your point layers
Before opening any distance dialog, spend a minute on the data. It saves a confusing afternoon later.
Check the coordinate reference system first. Right-click the layer in QGIS and choose Properties, then Source, or open the layer Properties, Source tab in ArcGIS Pro. If it reads Unknown or Unknown CRS, you have imported coordinates without a reference, and no distance tool will give you a meaningful number until you define it. Most community uploads are WGS84.
Next, inspect the attributes. Zoom to the layer and look for null or empty geometry, which usually shows as a record that will not draw. Fix those rows or drop them, because a single broken geometry can abort a processing tool with a message that names no useful field.
Finally, decide which features are the origins and which are the targets. Most beginners mix these up and get a number back that looks reasonable but describes the wrong direction. Layer A holds the points you are measuring from, Layer B holds the things you are measuring to.
Measure straight-line distance between two points in QGIS
For a single pair, use the Measure tool. Click the ruler icon on the Attributes toolbar, pick Measure Line, then click your first point and second point. The status bar or the measure window reports the distance in the unit of your project CRS. If the result appears in degrees, the project CRS is geographic, which is the mistake described in the units section below.
For two layers rather than two clicks, use the processing algorithm. Open Processing, then Toolbox, expand Vector measurement and double-click Distance Matrix.
In the dialog, set the Input target layer to Layer B and the Input source layer to Layer A. Choose the output matrix type you need: Linear for a two-column table of source-to-target distances, Standard for a square matrix of every pair. Leave the nearest neighbour options alone unless you specifically want zero distances on the diagonal. Under Advanced parameters, set the Distance unit to the value you want to see, such as metres or kilometres.
Run it and open the output layer. Every cell holds the distance from that source row to that target column. This is the tool people mean when they ask how to calculate a proximity matrix, and it answers a different question from Nearest Hub, which returns only the single closest target per source.
Measure distance from many points in QGIS
Most real work needs one distance per feature, not a full matrix. For a layer of sampling sites measured to the nearest city centre, use Distance to Nearest Hub. Open Processing, then Toolbox, then Vector measurement, then Distance to Nearest Hub. Set Hub points to the city centre layer, which should hold one feature, and Source points to your site layer. Set the output layer so the distance is written as a field rather than a new geometry, or you can keep the distance matrix option to get both.
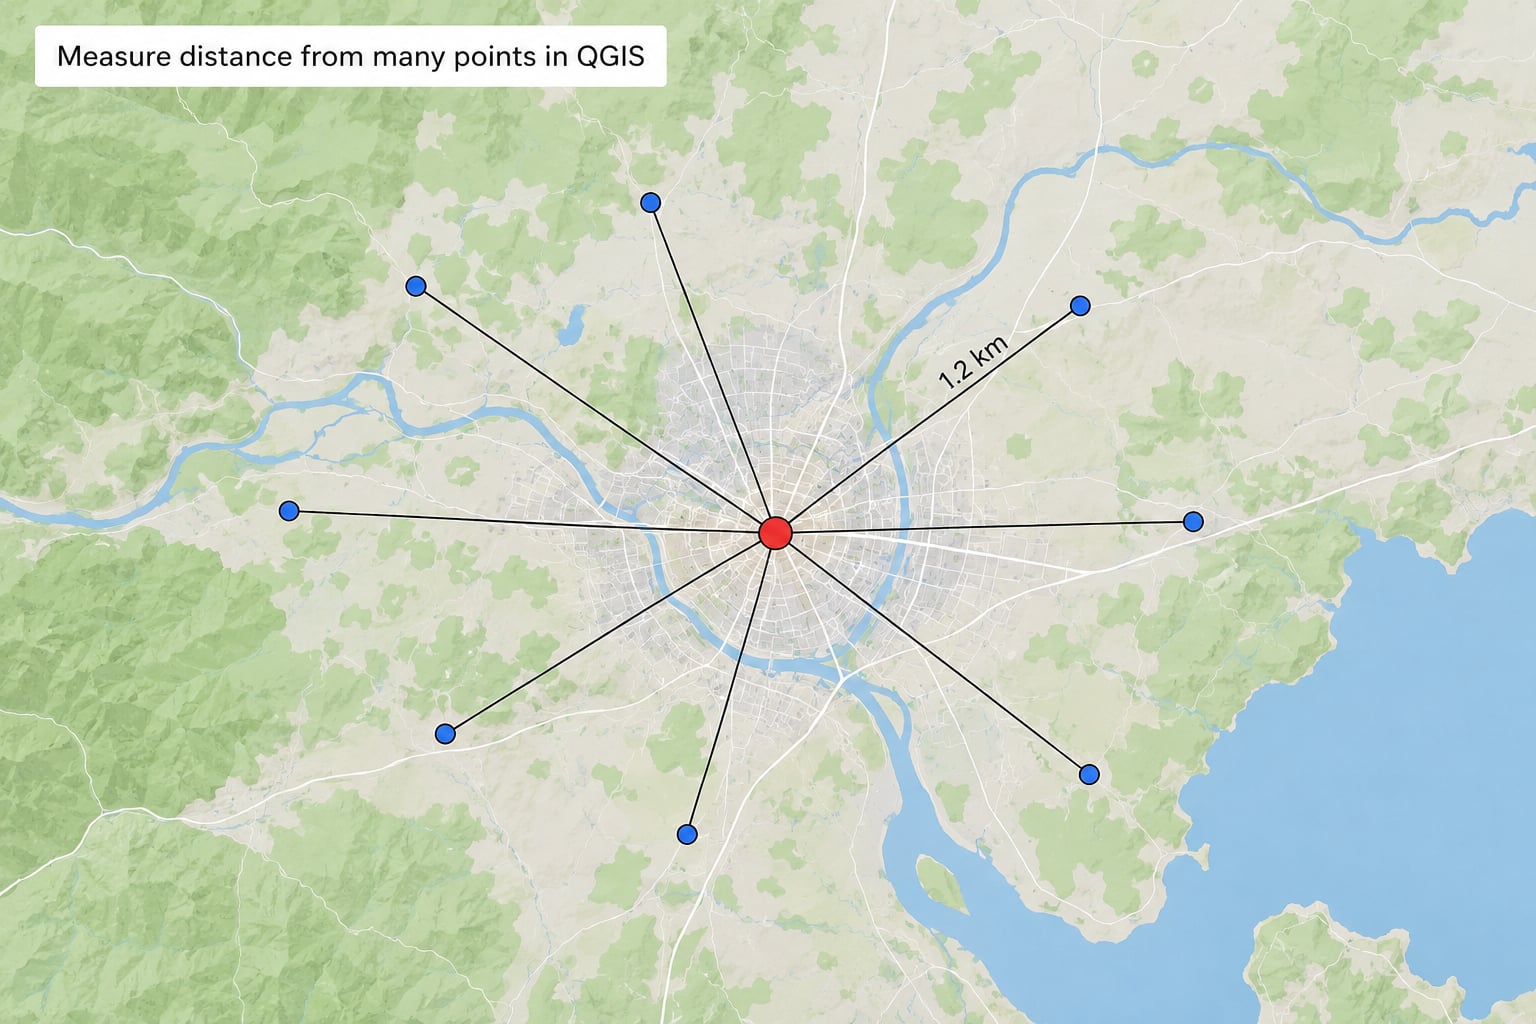
Run it and the resulting table carries two useful columns: the identifier of the hub that was matched and the distance to it, in the output unit you chose. For 40 sample sites and one city centre, you get 40 rows and one distance each. That is the number you paste into a statistics table.
If your hubs are polygons, such as catchment districts, the boundary rule applies. Every site inside a district returns zero. Use a centroid layer instead, or keep the boundary distance and treat zero as a separate category, since inside versus near-a-boundary is often the distinction you actually care about.
Two related tools handle the same job in different ways. Join attributes by nearest transfers the attributes of the closest feature onto each source, which is what you want when you need the hub’s name or code on the site record. Distance to Nearest Hub is better when distance itself is the deliverable.
Calculate distance between points in ArcGIS Pro
The Near tool is the workhorse. On the Analysis tab, open Tools, then Proximity, then Near. ArcGIS Pro also finds it through the Geoprocessing pane if you type Near in the search box.
Set Input features to Layer A and Near features to Layer B. Leave Search radius blank for an unlimited search, or set it when you want to discard features with no match inside a cutoff. Under Fields to join, tick the fields from the near layer you want copied onto the source records. In Method, choose Planar or Geodesic. Then run.
Near edits the input layer’s attributes in place, so work on a copy or set a new Output features path if you want the originals untouched. The output fields are worth knowing by name. NEAR_DIST holds the distance in the linear unit of the input spatial reference. NEAR_FID is the object ID of the matched feature, and NEAR_X and NEAR_Y give the coordinates of the closest location on that feature, which is how you get the perpendicular foot on a polyline. NEAR_ANGLE is the bearing in degrees. IN_FID identifies the source feature.
Generate Near Table does the same calculation without editing anything, adding a table instead. Use it when you want to keep every source-to-target pair, including more than one match per source.
For raster work, the Proximity tab on the Distance Accumulation tool builds a distance surface you can contour or threshold, and Euclidean Distance is the simpler variant. For routes, OD Cost Matrix solves the origin-to-destination travel problem on a network dataset, and Least Cost Path builds the route itself. The Near tool is vector proximity, Distance Accumulation is raster proximity, and OD Cost Matrix is network. Mixing them up is a common source of confusion.
If you only need the attributes of the closest feature, Spatial Join with the Match Option set to Closest does it in one step, without a separate distance field.
Check units, projection, and coordinate systems
This is the step that decides whether your answer is right.
Decimal degrees are not a distance. If a tool reports 0.0043, you are looking at degrees, not kilometres. Project the layer to a projected coordinate system, or set Distance method to Geodesic and accept the linear unit the tool offers.
Web Mercator, EPSG:3857, is the tempting shortcut because every web basemap uses it, and it is a poor choice for measurement. It is conformal, which means it preserves shape and badly distorts area and distance away from the equator. At high latitudes the inflation is severe, and it has been flagged repeatedly on Esri Community and GIS StackExchange. Never measure distance in Web Mercator.
For a projected choice, use the UTM zone whose central meridian is closest to your data, which means staying within about 6 degrees of longitude of that meridian. National grids work equally well inside their own country. Beyond that, an equidistant projection centred on your point of interest keeps distances true from that centre, and you can copy a built-in projection and change its central meridian and latitude of origin to do it.
Reproject when your data spans regions with different distortions, when you are combining layers from different sources, or when a downstream step such as buffering demands metres. Save the project CRS before you start so the default measurement unit is metres instead of degrees.
Interpret and validate the distance result
Open the output table and sanity-check it. NEAR_DIST should be positive, in a plausible range for your study area, and never suspiciously identical for every row. If all 40 sites report the same distance, you almost certainly measured to a single point layer with one feature and every match returned the same answer.
Compare one value against a distance you already trust. In the ArcGIS Learn ArcGIS walkthrough on choosing the right projection, the same pair of poles measures 1,758.73 km using a planar method and 1,866.63 km using a geodesic method. That gap of roughly 108 km on a pole-to-pole pair is the scale of error you are accepting when you stay planar at long range. On a few hundred metres in one UTM zone, the same choice changes nothing measurable.
Confirm the matched feature by reading NEAR_FID and looking at NEAR_X and NEAR_Y. Those coordinates should fall on or beside the target feature, and if they land somewhere unrelated, you have a multipart feature or a coincident pair of features rather than a distance problem.
Finally, document it. Write the method, the tool, the unit and the CRS into your methods section. A distance number without those four details cannot be reproduced by a reviewer or by yourself six months later.
Worked examples of common GIS distance jobs
A field transect of 300 m between two sampling points on a single site is a planar job, comfortably inside one UTM zone. Project to the local UTM zone, run Near, and the error is far below your measurement precision.
A city-to-city comparison across two UTM zones, or anything crossing the poles, is a geodesic job. Planar measurements stretch badly at high latitude and across zone boundaries, which is exactly where the 1,758 km versus 1,866 km gap appears.
A drive from a depot to a customer address is a network job. The straight line is a lower bound, never an estimate of the journey. Build a network dataset from your road centreline layer and run OD Cost Matrix, then report route length and travel time.
Distance from a sample site to the nearest edge of a protected area is a point-to-polygon job. The answer is measured to the boundary, so any site inside the polygon returns zero. Decide upfront whether you want distance to the boundary or to an inside-and-outside flag.
For raw latitude and longitude pairs outside any GIS software, the Haversine formula gives the great-circle distance on a sphere, with R set to 6371 km. It is a nested set of sine and cosine terms over the two latitude differences and the longitude difference, and there is a copy-paste Excel version.
Put latitude 1 in cell A2, longitude 1 in C2, latitude 2 in B2 and longitude 2 in D2, in decimal degrees. Then the formula is:
=2*6371*ASIN(SQRT(SIN(RADIANS(B2-A2)/2)^2+COS(RADIANS(A2))*COS(RADIANS(B2))*SIN(RADIANS(D2-C2)/2)^2))
Swap 6371 for 3959 to return statute miles. Bearing comes from a standard atan2 expression over the same four cells if you need direction as well as distance.
Common Mistakes
Six errors account for nearly every broken distance result posted in GIS communities.
1. Treating decimal degrees as distance. The layer is still geographic. Project to UTM or a national grid, or switch the tool’s Distance method to Geodesic.
2. Measuring in Web Mercator. EPSG:3857 inflates distance badly away from the equator. Reproject to UTM before any measurement.
3. Picking a UTM zone far from the data. Distortion grows as you move away from the central meridian. Pick the zone within about 6 degrees of longitude, or centre an equidistant projection on your area.
4. Expecting polygon distance to the centroid. Distance is to the boundary, and it is zero inside. Use a centroid layer if that is the measure you meant.
5. Confusing straight-line with route distance. Both are legitimate answers to different questions. Label which one you report, and use OD Cost Matrix or a network analysis tool when the question involves travel.
6. Not reading the output unit. Distances inherit the linear unit of the input spatial reference, so a tool set for metres can hand back kilometres on a national grid. Check the CRS rather than assuming.
Tips for reliable GIS distance analysis
Set the project CRS once, before loading layers, so measurement defaults are sensible and every new layer comes in with a defined spatial reference.
Label derived fields with their method and unit, for example DIST_KM_GEOD. Six months later that label is the only thing telling you how the number was produced.
Keep the original layers and project a copy. Reprojecting in place is the fastest way to lose a clean geographic layer you still need.
Check one distance you already know, such as a landmark pair measured in Google Earth or a stated road length. A single hand-check catches most configuration errors before they reach a report.
Use Calculate Distance Band from Neighbor Count when the distances feed a spatial statistic. It returns the minimum, maximum and average distance to the nth nearest neighbour, which gives you a defensible band for Hot Spot Analysis and Global Moran’s I instead of an arbitrary number.
Know when you are getting chordal distance. ArcGIS Pro falls back to chordal measurements when the input is not projected, which approximates true geodesic distance well only while your points sit within roughly 30 degrees of each other. Past that, the numbers drift quietly.
For repeated or large jobs, script it. arcpy for ArcGIS Pro, GeoPandas with Shapely in Python, and PostGIS with ST_DistanceSpheroid in a database all produce the same numbers once the CRS and method match, and they scale far better than a dialog.
Frequently Asked Questions
How do I calculate distance between points in ArcGIS Pro?
In ArcGIS Pro use Analysis, then Tools, then Proximity, then Near. Set Input features to the layer you measure from, Near features to the layer you measure to, choose Planar or Geodesic in the Method setting, and tick any fields you want joined from the near layer. The tool adds NEAR_DIST, NEAR_FID, NEAR_X, NEAR_Y and NEAR_ANGLE to each input feature. Use Generate Near Table instead when you want every source-to-target pair without editing the layer.
What is the formula for distance between points?
For two points in a projected coordinate system, Euclidean distance is the Pythagorean formula: square root of the sum of the squared differences in easting and northing, with the square root of the summed squared degrees also used for a planar equivalent. For latitude and longitude pairs, the Haversine formula measures great-circle distance on a sphere using the sine of the halved latitude difference. Geodesic formulas use the ellipsoid instead of a sphere and are the most accurate option.
Why are my distances coming out in decimal degrees?
Because your layer is still in a geographic coordinate system such as WGS84, which stores angles in degrees rather than a length. Every major tool has a Distance method setting: choose Geodesic, and the answer comes back in a real linear unit. Alternatively, project the layer to a projected coordinate system such as the appropriate UTM zone and measure planar distance there. Choosing a zone within about 6 degrees of longitude keeps the error negligible.
When should I use haversine distance instead of geodesic?
Use Haversine when you have raw latitude and longitude pairs and want a quick, dependable answer without any GIS software, such as in Excel or a script. It assumes the earth is a sphere, so it is fine for most distances and drifts slightly on very long routes. Use a geodesic method, which models the oblate spheroid, when the route is long, crosses the poles, or the result feeds a formal analysis. ArcGIS Pro and QGIS geodesic options do this for you.
How do I get the distance from every point in one layer to every point in another?
That is a distance matrix, not a nearest-neighbour calculation. In QGIS open Processing, then Toolbox, then Vector measurement, then Distance Matrix, set one layer as the source and the other as the target, and pick Linear or Standard output. In ArcGIS Pro, run Generate Near Table with no search radius, or use Spatial Join with the Closest option if you only want the attributes of the closest feature rather than every pair.
Start with the coordinate system: confirm your layer’s spatial reference, project it to the local UTM zone or set Distance method to Geodesic, then pick the tool that matches your question. Near and Distance to Nearest Hub for one distance per feature, Distance Matrix and Generate Near Table for every pair. Record the method and unit alongside the number and the result will hold up to scrutiny.